General Inspection, LLC
A premier Central European defense/military ammo manufacturing factory recently installed 10 high speed inspection machines from General Inspection, LLC for small caliber ammunition and ammunition components. The inspection machines measure and detect visual defects on 7.62, 5.56, and 9mm cases, projectiles, and fully loaded cartridges at rates of 300 per minute. Each of the inspection machines are equipped with Gi’s flexible, quick changeover centrifugal feeder systems.
For case and bullet inspection, the manufacturer chose Gi-6v’s which incorporate multiple lasers and cameras to provide complete measurement and visual defect detection on all surfaces. The stations include:
- Primer Vision Station
- Mouth Vision Station
- 3D Primer Depth Station
- 3D Primer Internal Diameter Station
- Laser Gauging Station
- Case Vision Station
- SD-Vision Station
Primer Vision Station for cases inspects the quality of the head stamp, detects missing and defective flash holes, burrs in the flash hole and measures primer pocket concentricity. The Mouth Vision Station measures wall thickness, concentricity, roundness, and detects splits, cracks, and burrs.

The 3D primer depth station is dedicated to measuring the depth of the primer pocket whilst the 3D primer pocket diameter station measures the primer pocket inner diameter at a specified depth location. These stations use multiple lasers and cameras for unparalleled accuracy and repeatability.
The Laser Gauging station provides 100% measurement to print specifications of all OD characteristics including Length to Sholder and Virtual Full-Form.
To detect visual defects to meet Mil-Std-636 standards, the Case Vision station was implemented. Visual defects include taper folds, dents, wrinkles, perforations, and splits. Other visual defects like stains, lacquer smear, annealing location, color, and draw scratches are detected with the SD-Vision Station.

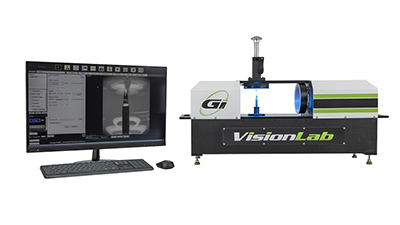
In addition to the high-speed inspection machines, the manufacturer also installed a Gi VisionLab-75 3D-Gauging System for first part inspection, and SPC sampling. The VisionLab measures with 2-micron precision and sub-micron repeatability and has unique capabilities with virtual full-form (virtual bottle-gauging), Length to Shoulder measurements, primer pocket depth, web thickness, and complete dimensional measurement capabilities including all pertinent GD&T features.

Latest from Defense and Munitions
- General Dynamics Electric Boat awarded $1 billion contract for material for Virginia submarines
- Find out the latest developments in tool path strategies for machining
- Building, maintaining the Navy’s next generation of maritime platforms
- ACE at 150: A legacy of innovation and industry leadership
- Collins Aerospace providing U.S. Army Black Hawk helicopters with modular avionics
- Address the challenges of machining high-temperature aerospace components
- Elevate your manufacturing operations with April’s Manufacturing Lunch + Learn
- Palantir Warp Speed accelerates, announces six new customers


